Wiki content is created, maintained, and administrated by players. Learn how you can help!
Client customization
Warning: Directly modifying the client files through any third party tools is completely unsupported by Shards of Dalaya staff. If anything breaks, do not contact them for help; there's nothing they can do about it. Also, third party programs not supplied from the official site might contain trojans, spyware, adware, and other harmful programs. As per the official rules, any third-party programs that are designed to alter the client, sniff or alter the data communication between client and server, or automate any task within the client are expressly forbidden.
Custom UIs for Shards of Dalaya
Here's a compiled list of custom UI Clients created by SoD users. Feel free to add a link to the UI and provide a screenshot.
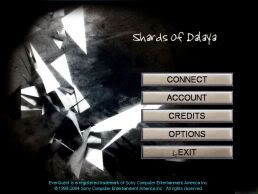
Llyver's Custom GUI
Other custom UIs
Browse to EQInterface. Versions from around 2007 to early 2008 are suggested for best compatibility. Download and extract the files into your uifiles folder in the game folder.
Making custom UIs work with our client
Editing UI xml is relatively simple given you have about 30 minutes to an hour to edit a little bit of code and image files.
Before editing any UI, make a clean copy of it someplace else so you can revert to the original in case of goof ups!
Log into your character and type /loadskin. This will bring up a window. Select the name of your UI, let it load and take a took at it. If it fails to load at all, you probably need to find a older version of it.
Make a macro called Loadskin, and in it use the following commands to quickly reload your UI so you can see the changes you are making quickly. The UINAME is the exact name as it appears in your /loadskin dialogue box and 1 is the command to tell it to leave the windows in the position they are in.
- /loadskin UINAME 1
Fixing Buff window length
Most UI's are set up for huge buff windows. To remove the code that tells the UI to look for these extra buff slots on your character, first open up the EQUI_Buffwindow.xml file in Notepad or some other simple text editor. These steps will change and some may be omitted, depending on the structure of the file.
- Use the search or find feature and type <Button Item="BW_Buff15_Button">
- Highlight and delete this all the way down to </button> just before it says <Label item="BW_Buff0">
- Do not delete <Label item="BW_Buff0">
- Find <Label item="BW_Buff15">
- Highlight and delete that down to </Label> just before it says <Screen item="Buff Window">
- Find the section labeled <Screen item="Buff Window">
- Highlight and delete this all the way down to <pieces>BW_Buff15_Button</pieces> through <pieces>BW_Buff24_Button</pieces>
- Highlight and delete <pieces>BW_Buff15</pieces> through <pieces>BW_Buff24</pieces>
Now you need to adjust your UI to remove the image of the buff window. Again, this will vary based on the UI.
This is a snippet of code, to use as an example.
<Ui2DAnimation item="Buff_Numbers_Top">

  <Cycle>true></Cycle>

  <Frames>
	<Texture>solWindowPieces03.tga</Texture>

	<Location>

	  <X>280</X>

	  <Y>10</Y>

	</Location>

	<Size>

	  <CX>15</CX>

	  <CY>574</CY>

	</Size>
The code is telling the UI to point to the file solWindowPieces03.tga and grab an image starting at the location 280, 10 (<X> and <Y> coordinates) and use a piece of that image whose size is 15 by 574 (<CX> and <CY>). Since you removed buff slots 16 through 25, the image containing those slots can be removed. Here is where you have to play with it a little bit.
While your game is still up and you have your UI loaded, trim off a couple pixels from the <CY> coordinates until the buff window shows only buff slots 1 through 15. It will look stretched out because the image is being forced to stretch to the size of the window. Don't worry about this just yet, just get the image to show buff slots 1 through 15.
To Adjust the window size and consequently correcting the stretch factor:
- Find the section that is labeled <Screen Item="Buff Window">
- Adjust the CY coordinates (as done above)
Since you just hacked off the unrecognized buff slots, you still have a long buff window that's pretty useless. You need to size it down. Modifying the size attribute will make the physical window smaller. Entering the <CY> attribute you figured out earlier into here should result in the image size and the window size being the same.
- Find the section labeled <StaticAnimation item="Buff_Top">
- Insert the same <CY> values you entered in earlier in the previous step.
See also
- Fixing Custom UI's to work with SoD! on the official SoD forums
Custom load screens
- Download HackersQuest and S3DSpy from the user Windcatcher.
- Use S3DSpy to make changes, it saves automatically, so be sure to make backups before running the program!
- When changing any of these archives you should use the "Update CRC" option in the "Archive" menu of EQInside to double check your CRC's match.
- Copy the CRC from the original file, and paste it into the updated file if necessary (you DID make a .bak, right?)
- The ESRB and SOE splashes are in eqfeart11.pak.
- The startup screen and the login screen are both in a file called eqfeartintros.pak.
- The filename for the startup screen is introscreen.bmp.
- The filename for the login screen is loginscreen.bmp.
- The server select screen
- The archives: eqfeart1.pak, eqfeart2.pak, eqfeart6.pak, eqfeart14.pak.
- The background: selserver.bmp inside eqfeart1.pak.
- The top banner: sbanner.bmp inside eqfeart2.pak
- The arrows: sbdown2.bmp and sbup2.bmp inside eqfeart1.pak. (this file is known to be one that has issues with the CRC, see above fix)
- The checkboxes: chekbox1.bmp and chekbox2.bmp inside eqfeart1.pak. (this file is known to be one that has issues with the CRC, see above fix)
- Other stuff:
- highlight.bmp - eqfeart1.pak (this file is known to be one that has issues with the CRC, see above fix)
- selserver_overlay.bmp -eqfeart6.pak
- no_play.bmp -eqfeart14.pak
- The loading/zoning screen is in a file called bmpwad8.s3d, the filename for the image itself is eqpload.bmp.
- The EULA, News, and Luclin Options screens are in eqfeart1.pak under the file name news.bmp
- The EULA top banner is in eqfeart8.pak, under the file name txeula.bmp
- The News top banner is in eqfeart2.pak, under the file name txnews2.bmp
- The Luclin Options top banner is in eqfeart8.pak, under the file name txluclinoptions.bmp